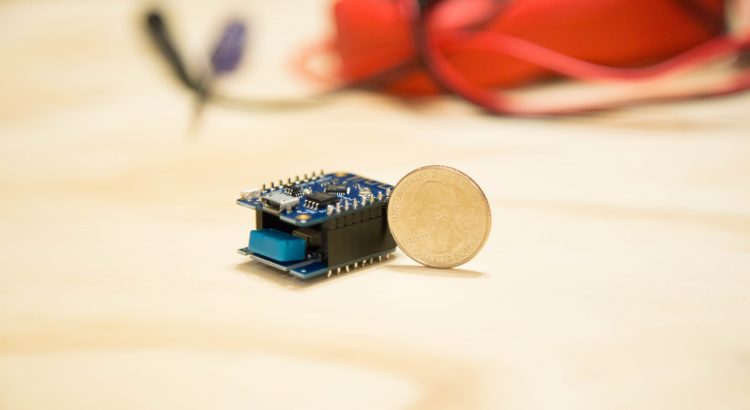
Connecting Wemos with Cayenne using MQTT is quick and simple. The Wemos D1 is one of the smallest board using the WiFi ESP chip. These also come with a variety of shields such as the DHT11 for temperature and humidity readings. Stay tune for other articles on how to take this module to a finish product and commercializing it.
Imagine the possibilities that these small MCUs can do when we connect it with an IoT Cloud such as Cayenne. In this tutorial, we are going to walk you through how to connect the Wemos D1, the DHT11 shield and Cayenne using MQTT. By doing so you will be able to send Temperature and Humidity data to Cayenne and visualize it.
Cayenne makes it easy and secured to connect Wifi and LoRa devices. Make sure to create an account and follow the steps below to add your first device.
Sketch Code
The follow sketch code requires the follow libraries:
// Tinkernlearn.com - This example shows how to connect the Wemos D1 pro & DHT11 with Cayenne using MQTT

//#define CAYENNE_DEBUG
#define CAYENNE_PRINT Serial
#include <CayenneMQTTESP8266.h>
#include <WEMOS_DHT12.h>

DHT12 dht12;

// WiFi network info.
char ssid[] = "WIFI_SSID";
char wifiPassword[] = "WIFI_PASSWORD";

// Cayenne authentication info. This should be obtained from the Cayenne Dashboard.
char username[] = "MQTT_USERNAME";
char password[] = "MQTT_PASSWORD";
char clientID[] = "MQTT_CLIENT_ID";

unsigned long lastMillis = 0;

void setup() {
	Serial.begin(9600);
	Cayenne.begin(username, password, clientID, ssid, wifiPassword);
}

void loop() {
	Cayenne.loop();

	//Publish data every 10 seconds (10000 milliseconds). Change this value to publish at a different interval.
	if (millis() - lastMillis > 10000) {
		lastMillis = millis();

    if(dht12.get()==0){
      Cayenne.celsiusWrite(1, dht12.cTemp);
      Cayenne.virtualWrite(2, dht12.fTemp, TYPE_TEMPERATURE, UNIT_FAHRENHEIT);
      Cayenne.virtualWrite(3, dht12.humidity, TYPE_RELATIVE_HUMIDITY, UNIT_PERCENT);
    }
	}
}

//Default function for processing actuator commands from the Cayenne Dashboard.
//You can also use functions for specific channels, e.g CAYENNE_IN(1) for channel 1 commands.
CAYENNE_IN_DEFAULT()
{
	CAYENNE_LOG("CAYENNE_IN_DEFAULT(%u) - %s, %s", request.channel, getValue.getId(), getValue.asString());
	//Process message here. If there is an error set an error message using getValue.setError(), e.g getValue.setError("Error message");
}
Getting Started with Cayenne
- After logging in to your account you will see the screen below for the first time. If you have an existing account with devices, go ahead and click on: “Add Device”
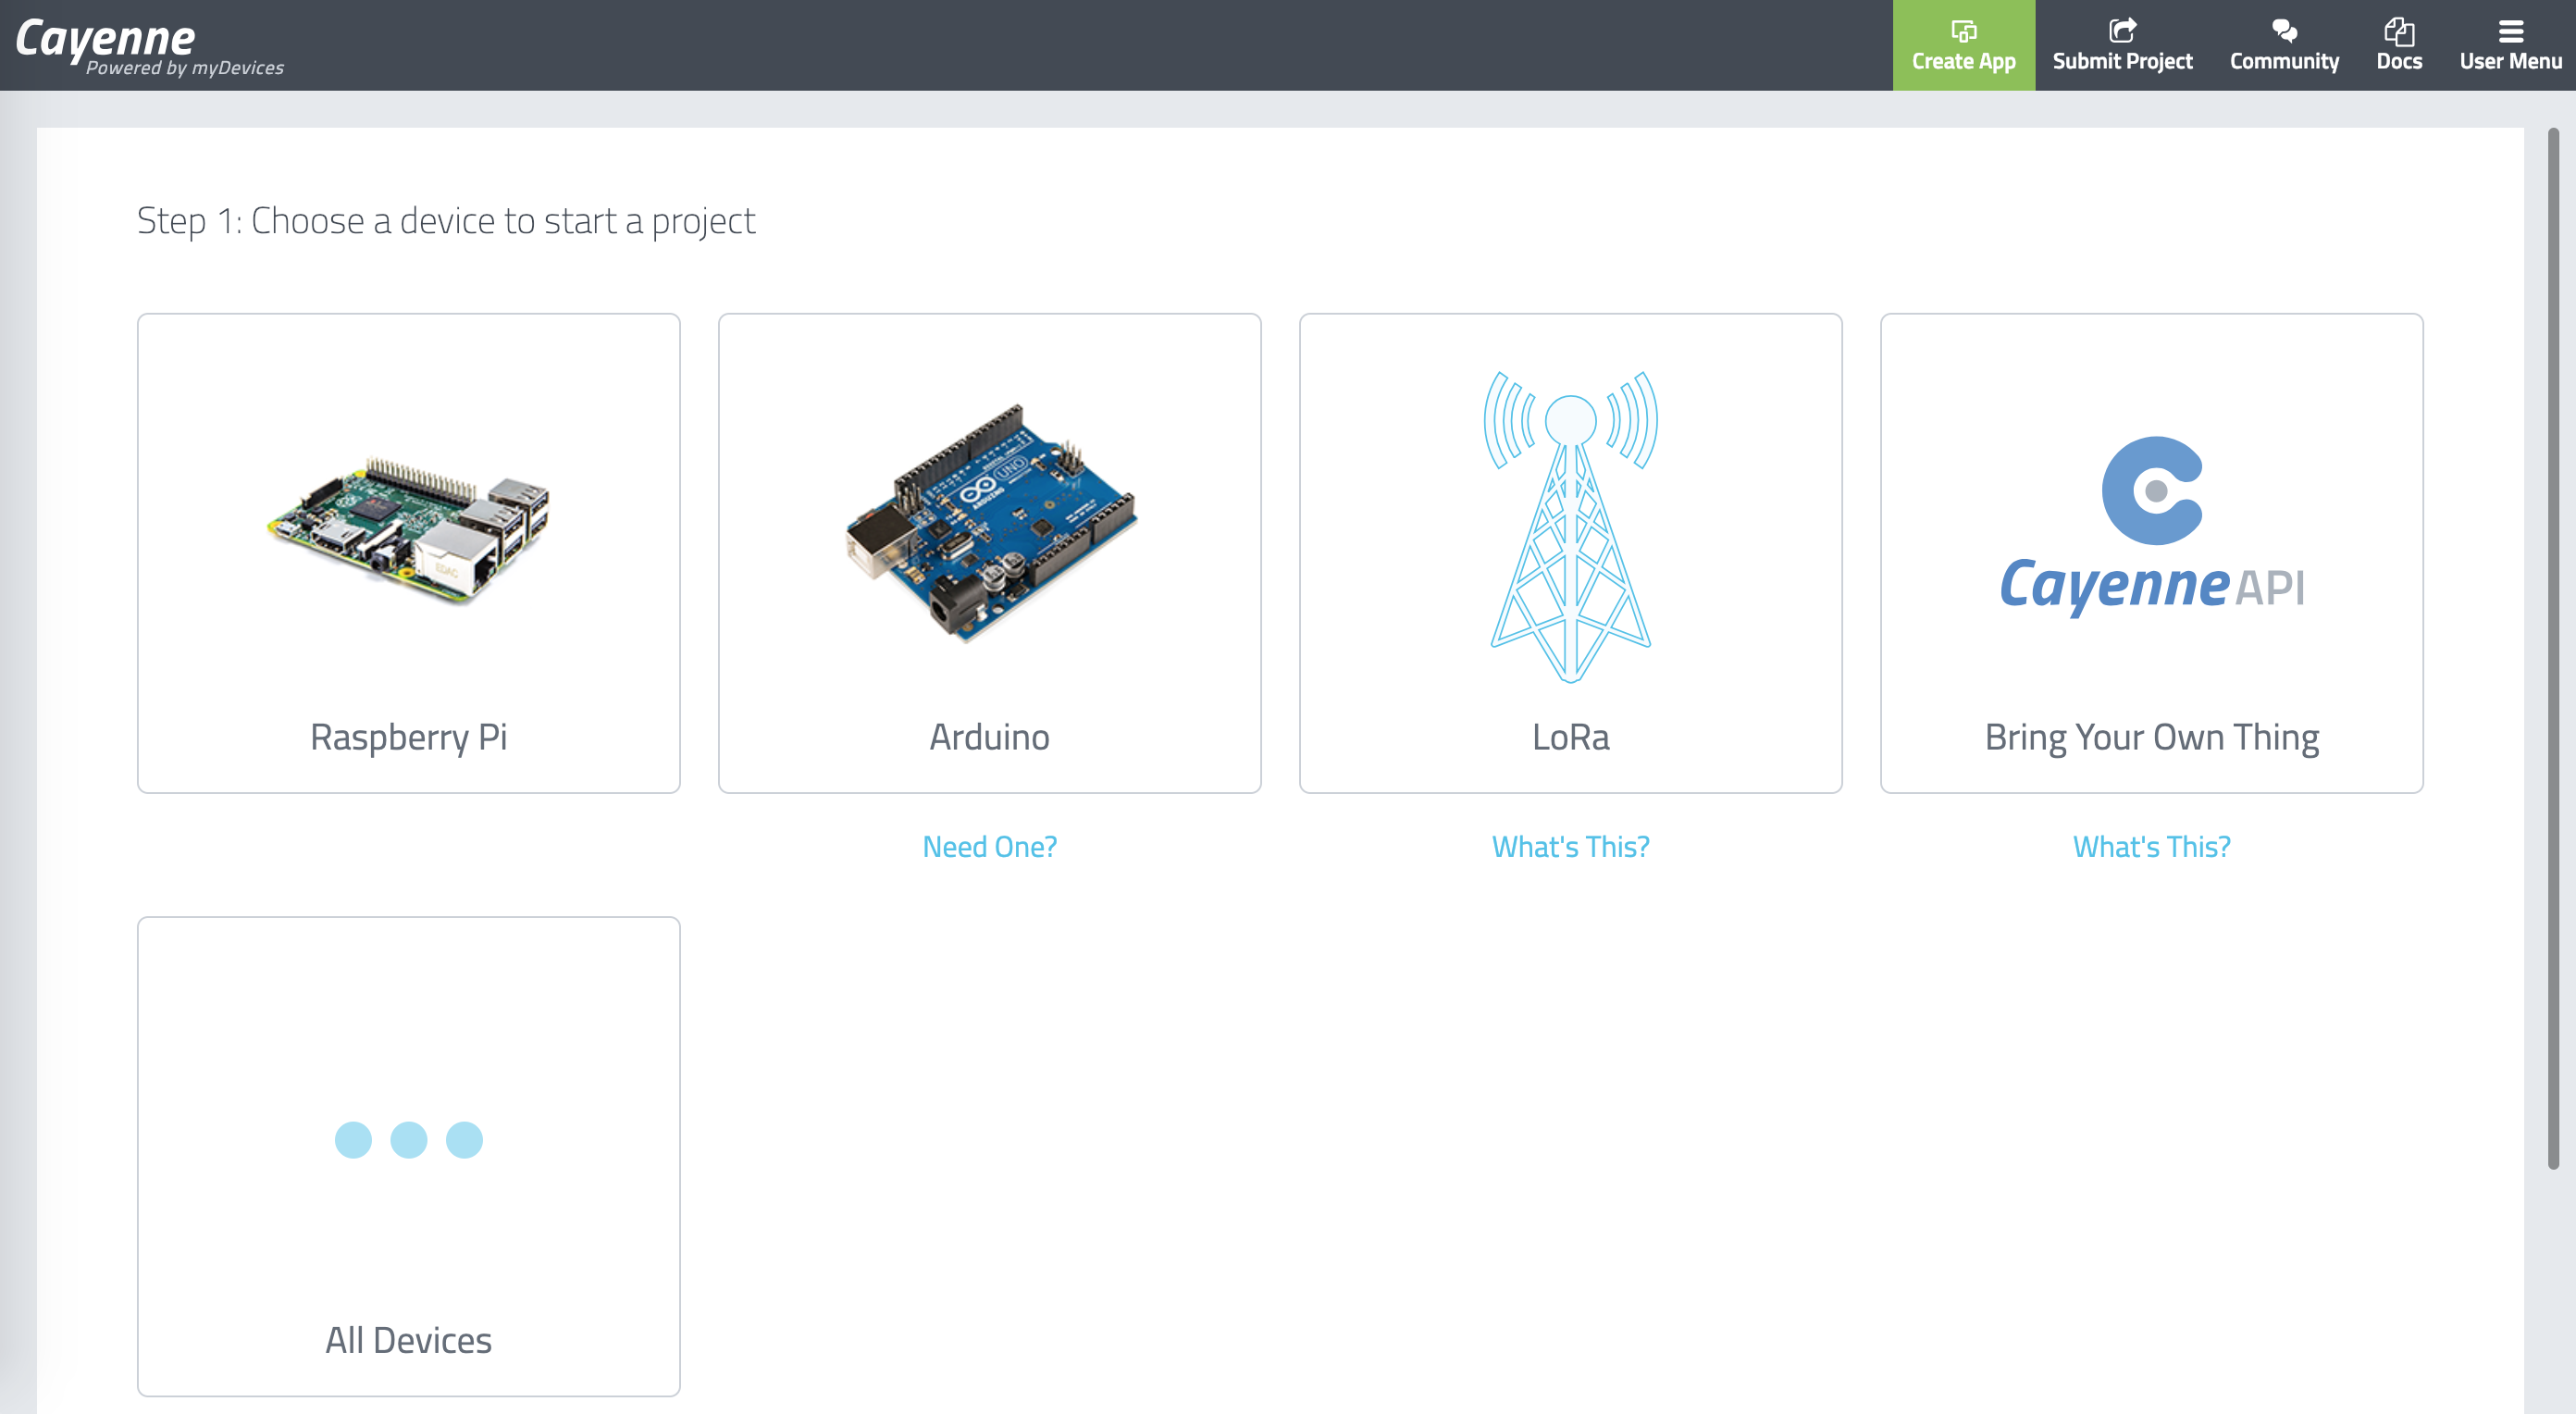
2. Click on “Cayenne API – Bring your Own Thing” this will generate device MQTT credentials and indicate where to connect.
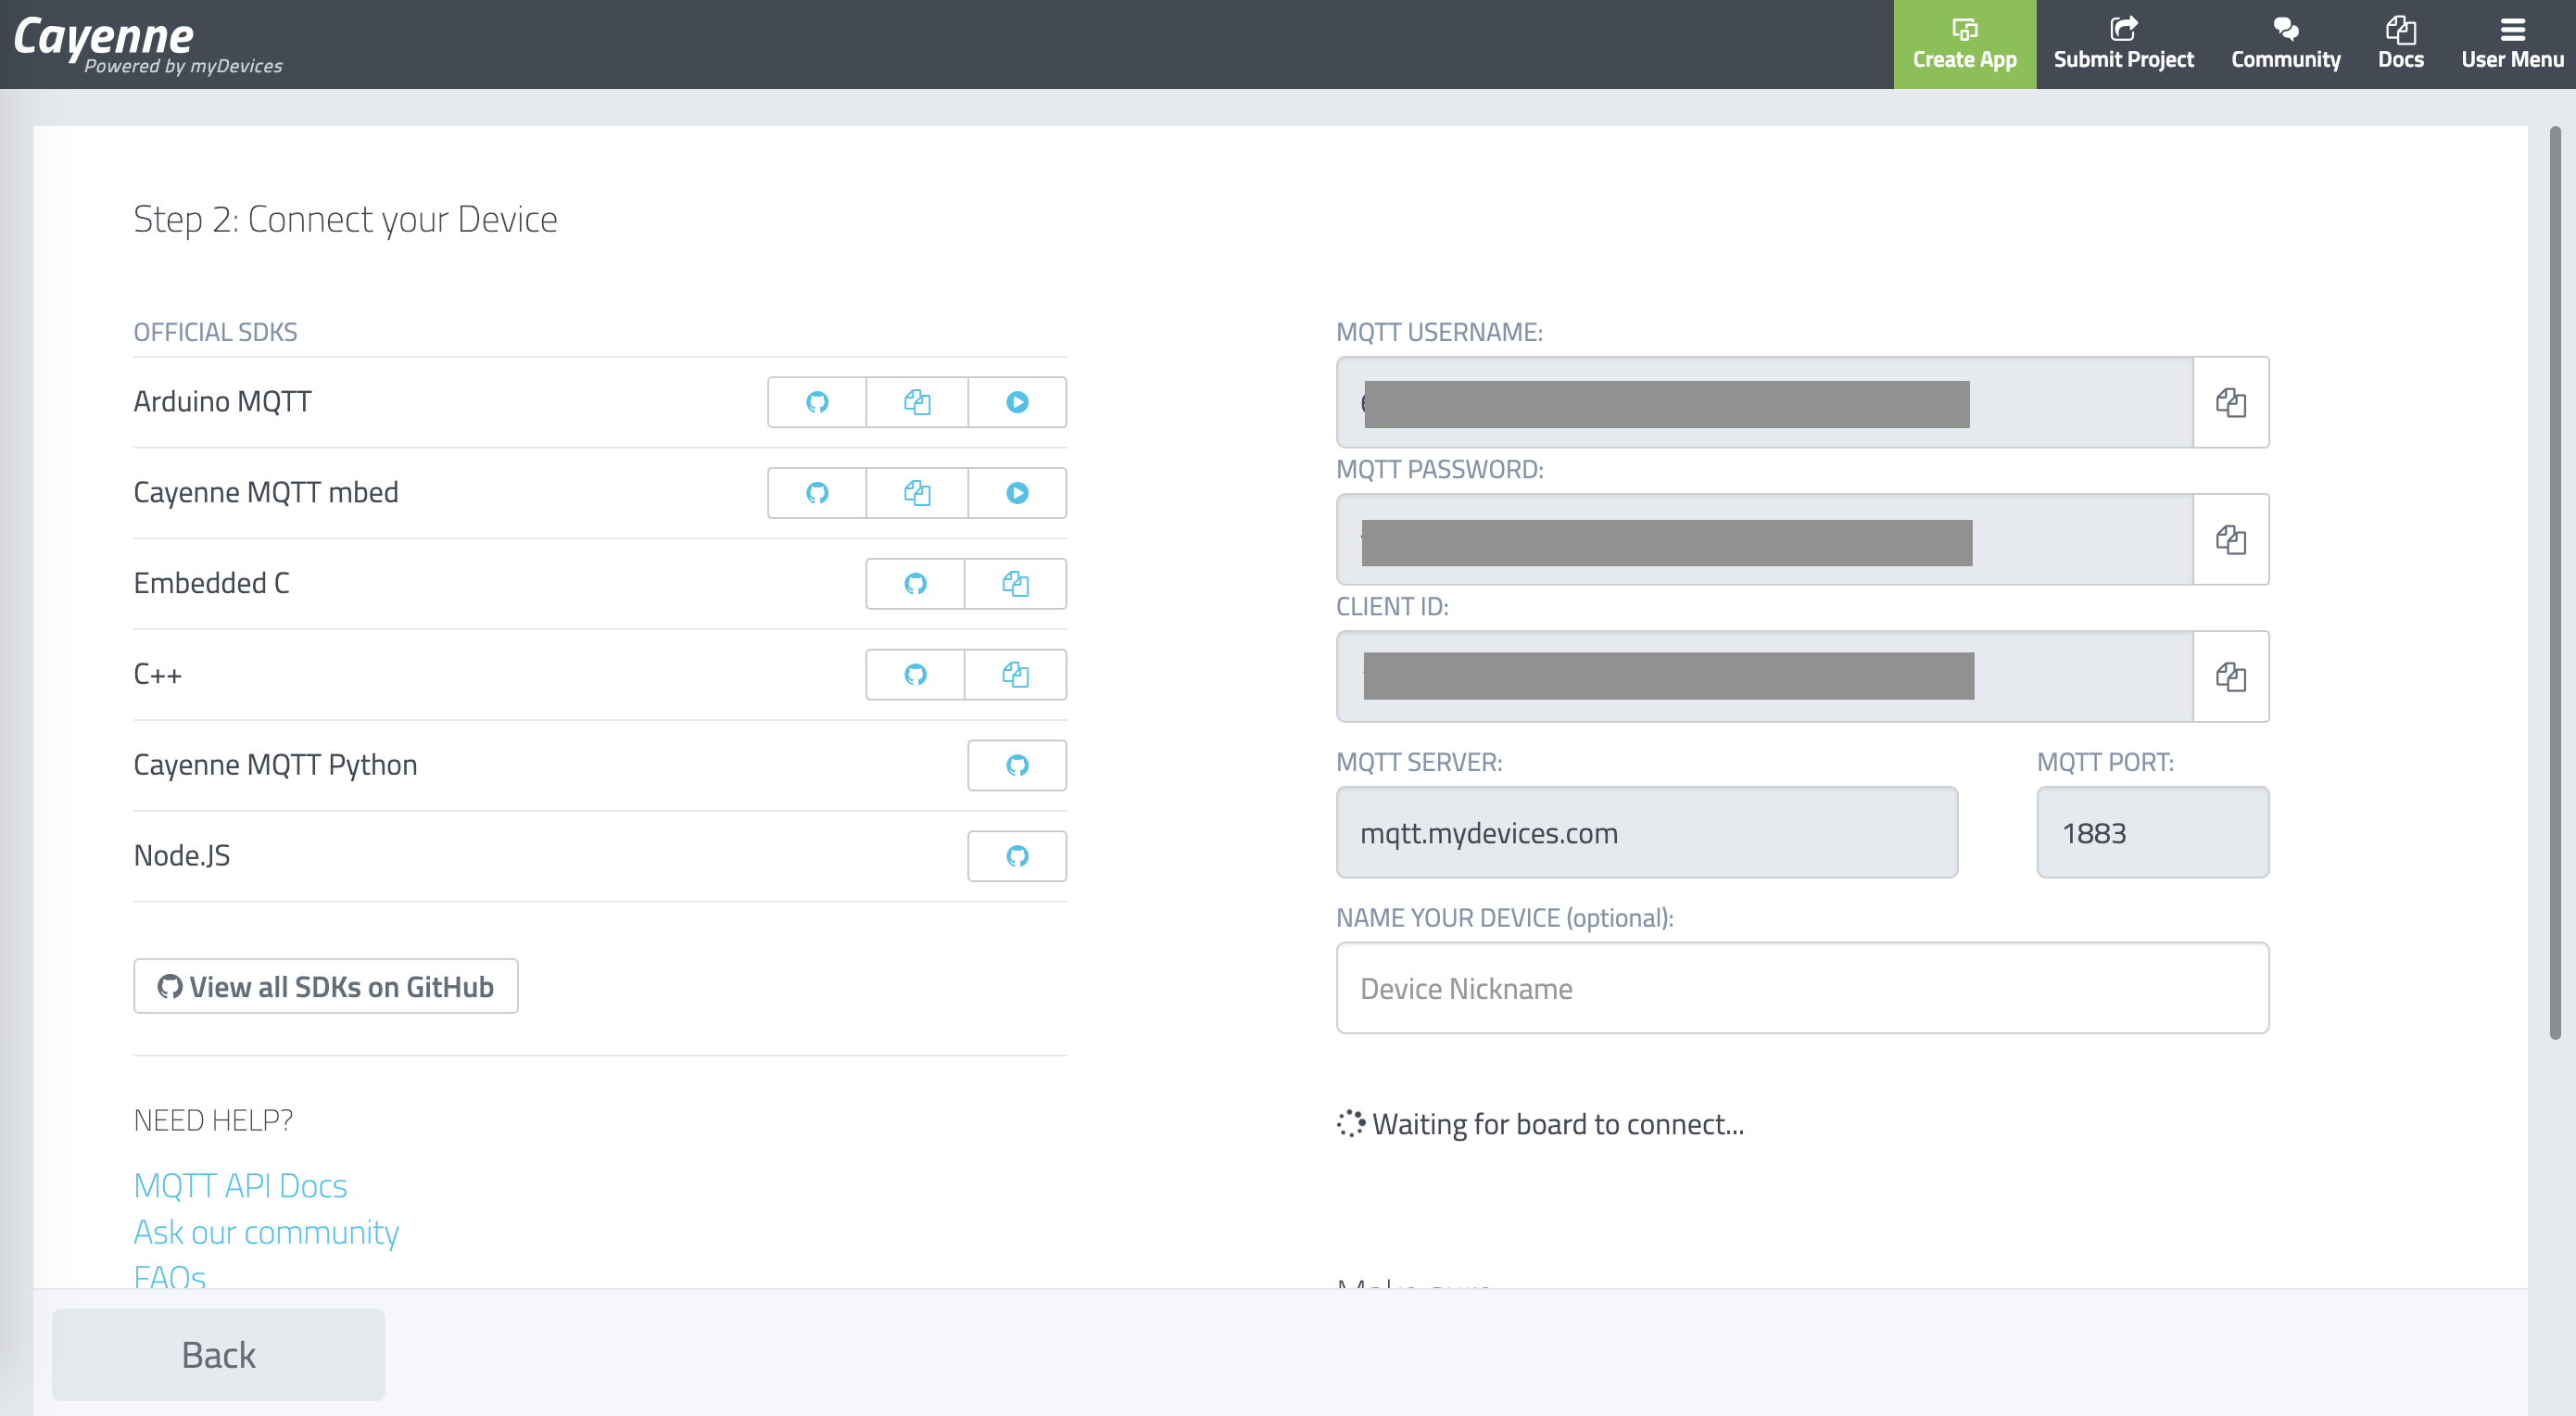
3. Copy each corresponding credential in the corresponding Sketch setting such as: MQTT_USERNAME, MQTT_PASSWORD and CLIENT_ID
4. Once you compile and flash the board the application will redirect the dashboard your connected device.
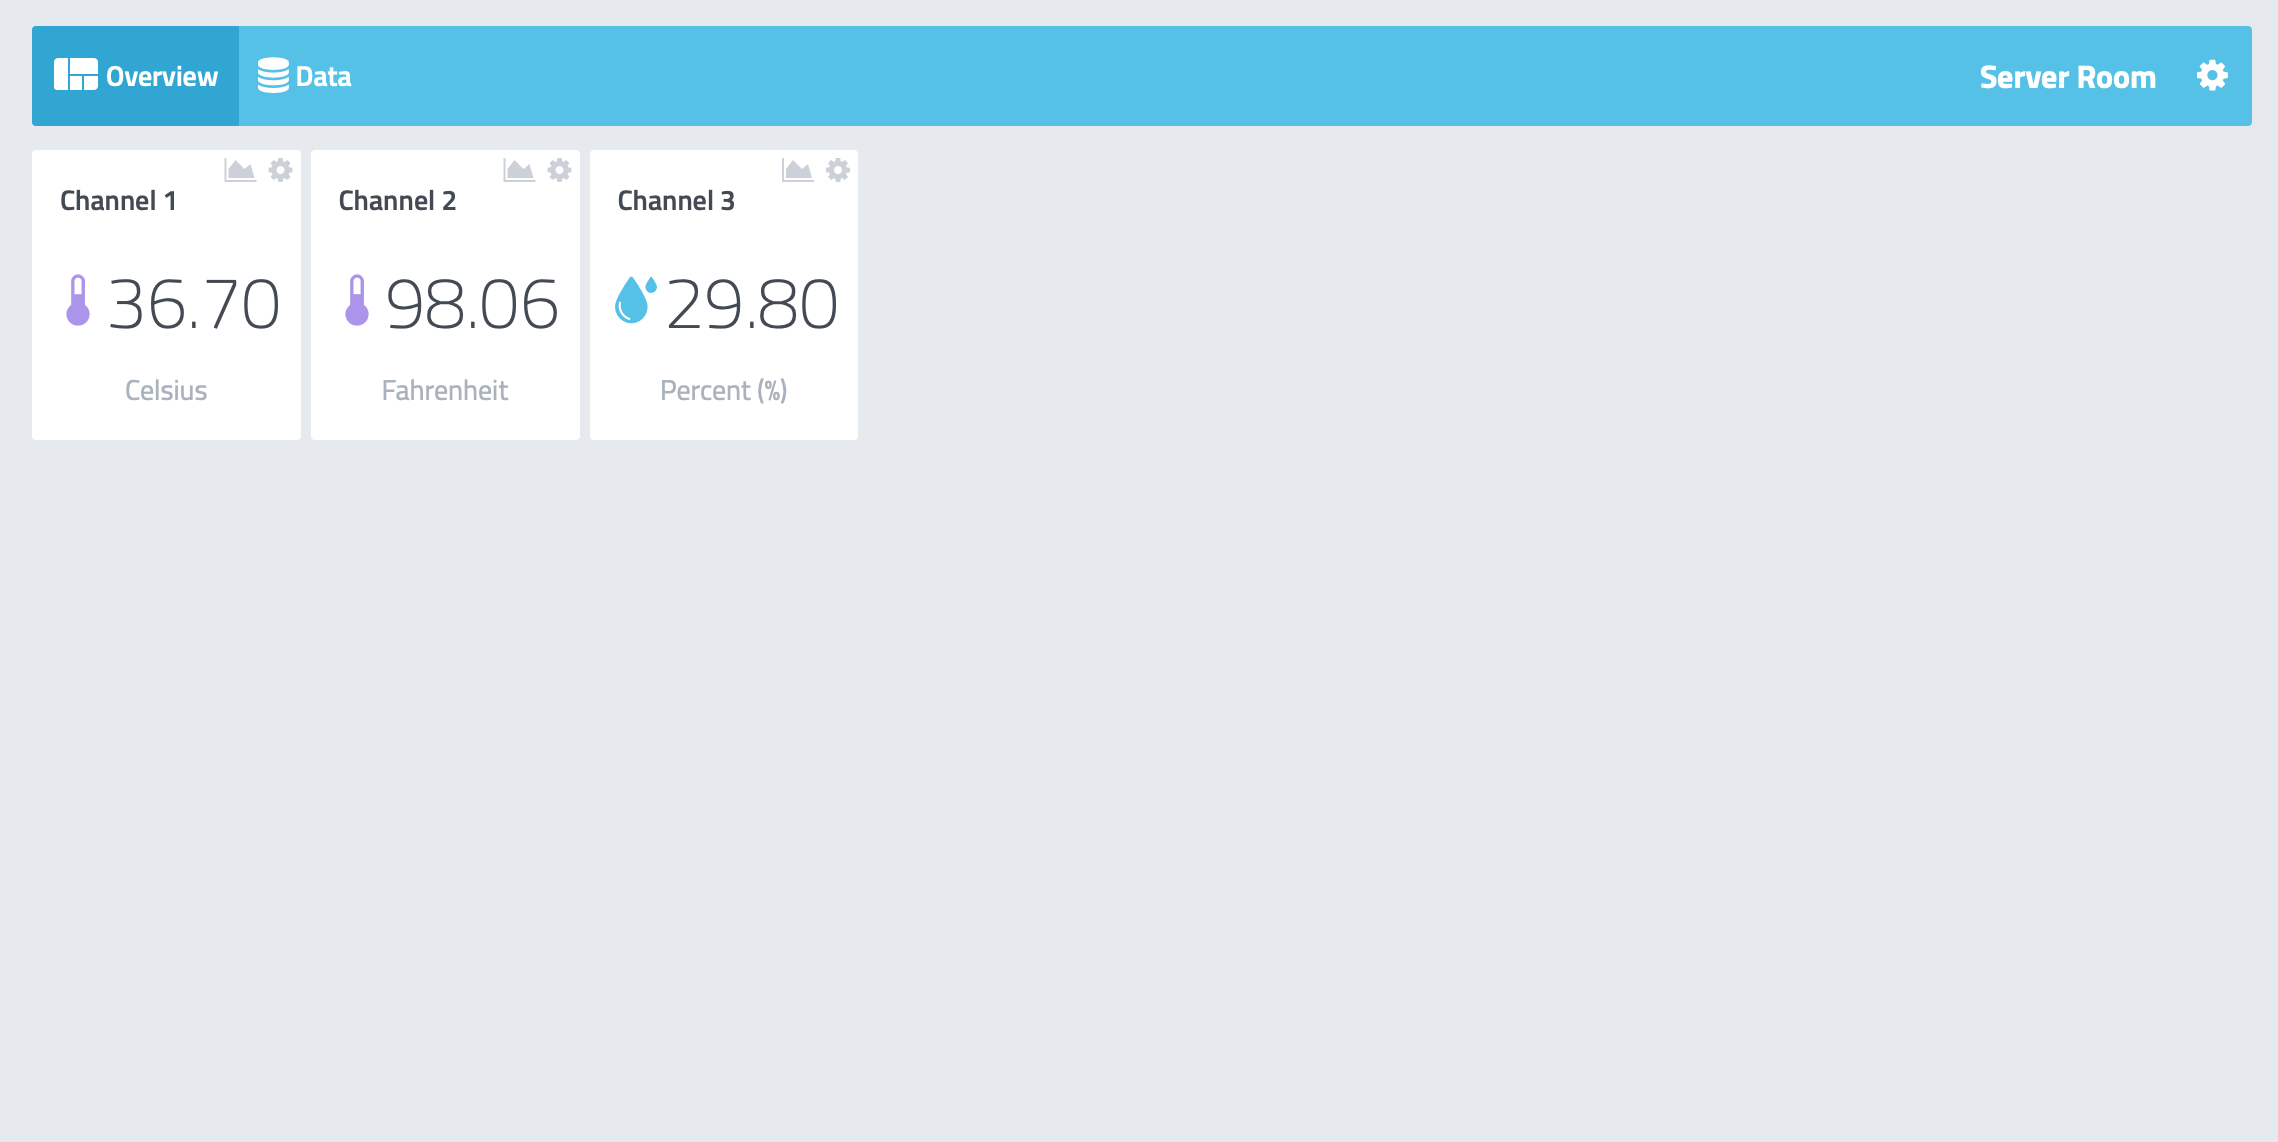
Cayenne widgets will automatically pop up for your device with temperature and humidity reading.